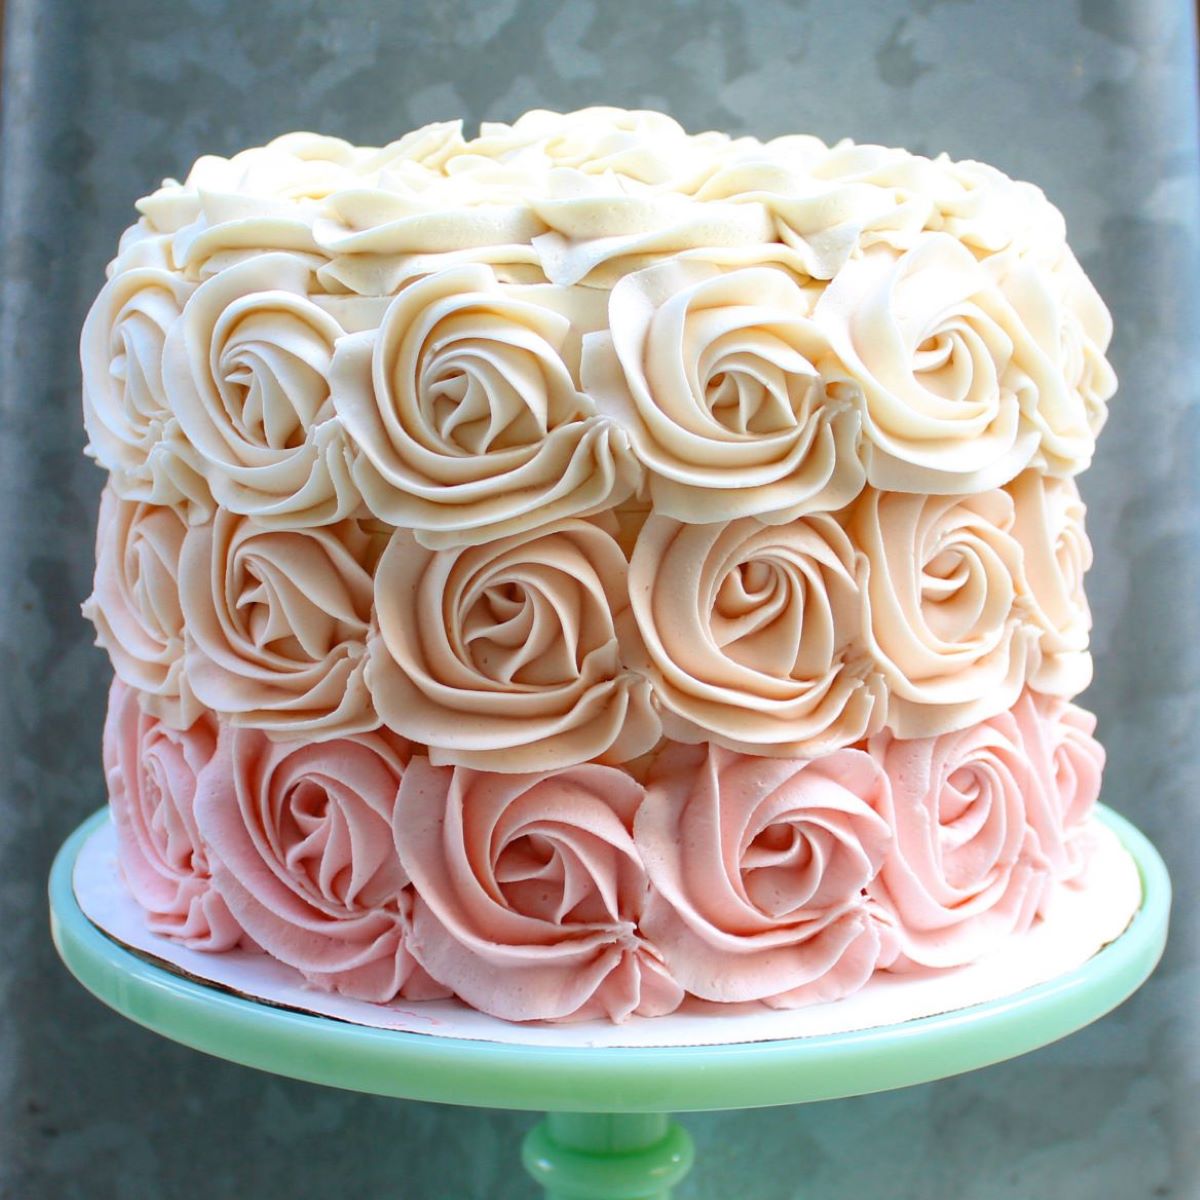
In the realm of baking, mastering the art of creating a delectable butter icing is a fundamental skill that elevates any dessert to extraordinary heights. Simple butter icing, with its velvety texture and rich flavor, serves as a versatile canvas for countless baking creations.
Its ease of preparation and endless customization options make it a beloved choice among both novice and seasoned bakers.
Throughout history, butter icing has graced countless cakes, cupcakes, and pastries, adding a touch of sweetness and sophistication to every bite. Its origins can be traced back to the Victorian era, where it was known as “boiled icing” due to the method of preparation.
Today, with the advent of modern appliances, creating simple butter icing has become a breeze, allowing home bakers to effortlessly recreate this culinary masterpiece.
Introduction
Simple butter icing is a versatile and delicious frosting used in various baking applications. It is a combination of butter, powdered sugar, milk, and flavorings, creating a smooth and creamy texture. Its simplicity and adaptability make it a popular choice for both professional bakers and home cooks alike.
The exact origin of simple butter icing is unknown, but its use in baking can be traced back to the early 19th century. It is believed to have originated in Europe, where it was commonly used to decorate cakes and pastries.
Over time, it gained popularity worldwide and became a staple ingredient in many baking recipes.
Ingredients
The following ingredients are essential for creating a delectable simple butter icing:
Unsalted Butter
The unsalted butter serves as the foundation of the icing, providing a rich and creamy texture. Its lack of salt allows for precise control over the sweetness of the icing.
Confectioners’ Sugar
Confectioners’ sugar, also known as powdered sugar, is a key ingredient that adds sweetness and bulk to the icing. Its fine texture ensures a smooth and velvety consistency.
Milk
Milk acts as a binder, helping to create a spreadable consistency. It also contributes to the overall sweetness and richness of the icing.
Vanilla Extract (Optional)
Vanilla extract is an optional ingredient that adds a subtle flavor enhancement. It complements the sweetness of the icing and adds a touch of sophistication.
3. Equipment
Preparing simple butter icing requires a basic set of equipment and tools that ensure efficient mixing and a smooth, consistent texture.
Bowls
- Mixing bowl: A medium-sized bowl is ideal for combining the butter, sugar, and milk. It should be large enough to accommodate the ingredients and allow for thorough mixing.
- Sifting bowl: A small bowl is used to sift the powdered sugar, removing any lumps and ensuring a fine, smooth texture.
Spatulas
- Rubber spatula: A flexible rubber spatula is used to scrape the sides of the bowls and ensure all ingredients are incorporated evenly.
- Offset spatula: An offset spatula is useful for spreading the icing smoothly and evenly over the cake or other desserts.
Other Tools
- Measuring cups and spoons: Accurate measuring ensures the correct proportions of ingredients, resulting in the desired consistency and flavor.
- Electric mixer: An electric mixer with paddle or whisk attachments makes the mixing process easier and faster, achieving a light and fluffy texture.
4. Step-by-Step Guide
Follow these simple steps to prepare a delectable batch of butter icing:
1. Cream the Butter
In a large bowl, use a hand mixer or electric mixer to cream the softened butter until it is light and fluffy. This process incorporates air into the butter, giving the icing a smooth and airy texture.
2. Gradually Add the Sugar
With the mixer on low speed, gradually add the sifted confectioners’ sugar to the creamed butter. Add it in small increments, mixing thoroughly after each addition to prevent lumps from forming.
3. Incorporate the Milk
Once the sugar is fully incorporated, add the milk one tablespoon at a time. The milk helps to thin out the icing and make it more spreadable. Adjust the amount of milk added to achieve your desired consistency.
4. Add Flavorings (Optional)
If desired, add any flavorings such as vanilla extract, almond extract, or food coloring to the icing. Mix well to distribute the flavorings evenly.
5. Beat until Smooth
Once all ingredients are combined, increase the mixer speed to medium and beat until the icing is smooth and creamy. This final beating helps to develop the icing’s texture and make it easy to spread.
5. Variations

The basic butter icing recipe can be easily customized to create a variety of flavors and textures. Here are a few popular variations:
Flavored Icings
- Vanilla Icing: Add 1 teaspoon of vanilla extract to the icing.
- Chocolate Icing: Add 1/4 cup of unsweetened cocoa powder to the icing.
- Strawberry Icing: Add 1/4 cup of mashed strawberries to the icing.
- Lemon Icing: Add 1 tablespoon of lemon juice and 1/2 teaspoon of lemon zest to the icing.
Textured Icings
- Creamy Icing: Beat the icing for an extra 2-3 minutes until it becomes light and fluffy.
- Stiff Icing: Beat the icing for an extra 5-7 minutes until it holds stiff peaks.
- Crumbly Icing: Add 1/4 cup of finely crushed graham crackers or vanilla wafers to the icing.
- Fudge Icing: Cook the icing over low heat until it thickens and becomes glossy.
6. Troubleshooting
When making simple butter icing, it is possible to encounter some common problems. Here are some troubleshooting tips to help you achieve a perfect icing:
Icing is too thick
*
-*Problem
The icing is too thick to spread or pipe.
-*Solution
Add a little bit of milk or water, one tablespoon at a time, until the desired consistency is reached.
Icing is too thin
*
-*Problem
The icing is too thin and runny.
-*Solution
Add a little bit more powdered sugar, one tablespoon at a time, until the desired consistency is reached.
Icing is grainy
*
-*Problem
The icing is grainy or lumpy.
-*Solution
Make sure the butter is at room temperature and the powdered sugar is sifted before adding it to the butter. Cream the butter and powdered sugar together until light and fluffy.
Icing is too sweet
*
-*Problem
The icing is too sweet.
-*Solution
Add a little bit of salt to the icing to balance out the sweetness.
Icing is too bland
*
-*Problem
The icing is too bland.
-*Solution
Add a little bit of vanilla extract or other flavoring to the icing.
7. Storage and Shelf Life
Simple butter icing can be stored in the refrigerator for up to 2 weeks. It should be placed in an airtight container to prevent it from drying out. The icing can also be frozen for up to 3 months. To thaw, place the icing in the refrigerator overnight.
Factors Affecting Shelf Life
The shelf life of simple butter icing can be affected by several factors, including:
- Temperature: Butter icing is best stored in a cool, dry place. High temperatures can cause the icing to melt and become runny.
- Humidity: Butter icing can absorb moisture from the air, which can cause it to become thin and watery.
- Light: Butter icing can be damaged by exposure to light. This can cause the icing to discolor and become rancid.
- Oxygen: Butter icing can oxidize when exposed to oxygen. This can cause the icing to become discolored and develop an off-flavor.
8. Serving Suggestions
Simple butter icing is a versatile topping that can enhance a wide range of baking creations. Its smooth, creamy texture and subtle sweetness complement various cakes, cupcakes, and other desserts.
Cakes
- Layer the icing between moist chocolate or vanilla cake layers for a classic and indulgent treat.
- Spread a thick layer over a fluffy white or yellow cake for a light and airy confection.
- Decorate a festive birthday cake with colorful sprinkles or chopped nuts sprinkled on top of the icing.
Cupcakes
- Pipe the icing into decorative swirls or rosettes atop cupcakes for a sophisticated presentation.
- Fill cupcakes with fruit preserves or chocolate ganache before topping them with butter icing for a delightful combination of flavors.
- Create fun designs by using cookie cutters to shape the icing into stars, hearts, or other festive shapes.
Other Desserts
- Use butter icing as a glaze for cinnamon rolls or sticky buns for a sweet and sticky finish.
- Spread the icing over cookies or bars for a simple yet satisfying topping.
- Dip strawberries or other fruits into the icing for a decadent and refreshing treat.
Final Conclusion

As we conclude our exploration of the simple butter icing recipe, it is evident that this culinary delight holds a special place in the hearts of bakers and dessert enthusiasts alike. Its versatility, ease of preparation, and endless customization options make it a staple in any baker’s repertoire.
Whether you are a seasoned professional or just starting your baking journey, mastering the art of simple butter icing will undoubtedly elevate your creations to new heights. So, gather your ingredients, prepare your equipment, and embark on a delightful adventure in the world of baking with this timeless and irresistible treat.
Answers to Common Questions
Can I use salted butter instead of unsalted butter?
Yes, you can use salted butter, but reduce the amount of added salt in the recipe to prevent the icing from becoming too salty.
How can I thin out the icing if it’s too thick?
Add a small amount of milk or water, one tablespoon at a time, until the desired consistency is reached.
How can I make the icing stiffer if it’s too thin?
Add a small amount of powdered sugar, one tablespoon at a time, until the desired consistency is reached.
Can I add flavorings to the icing?
Yes, you can add various flavorings such as vanilla extract, almond extract, or cocoa powder to create different flavor variations.
How long can I store the icing?
Simple butter icing can be stored in an airtight container in the refrigerator for up to 3 days.
