
As the autumn leaves transform into vibrant hues of orange and crimson, the air crackles with anticipation for the most spooktacular night of the year – Halloween. Amidst the eerie decorations, spine-chilling tales, and trick-or-treating adventures, there’s one delectable treat that holds a special place in our hearts: Halloween cookies.
With their captivating shapes, vibrant colors, and tantalizing flavors, Halloween cookies are more than just a sweet indulgence; they’re edible works of art that capture the spirit of the season. Dive into this comprehensive guide to explore the enchanting world of Halloween cookies, from their historical roots to creative decorating ideas that will make your Halloween celebration truly unforgettable.
Introduction to Halloween Cookies Recipe
Halloween cookies are a delectable treat that adds sweetness and spookiness to the festive occasion. These cookies are not just ordinary baked goods; they hold a special significance in Halloween celebrations, serving as edible decorations and symbolic tokens of the holiday’s spirit.
The history of Halloween cookies can be traced back to ancient Celtic traditions, where people would bake cookies in the shape of skulls, bones, and other spooky figures to ward off evil spirits. Over time, these cookies evolved into the delightful treats we know today, adorned with colorful icing, sprinkles, and creative designs.
Interesting Facts About Halloween Cookies
- Halloween cookies are the most popular baked goods during the Halloween season, with an estimated 100 million cookies consumed annually in the United States alone.
- The most popular Halloween cookie shapes include pumpkins, witches, ghosts, and bats, with variations depending on regional traditions and personal preferences.
- Halloween cookies are often decorated with vibrant colors, including orange, black, green, and purple, which are associated with the spooky and festive atmosphere of Halloween.
- Some Halloween cookies are filled with sweet treats like chocolate chips, candies, or caramel, adding an extra layer of indulgence to the experience.
- Halloween cookies are not just enjoyed at home; they are also popular treats at Halloween parties, trick-or-treating events, and other festive gatherings.
Types of Halloween Cookies
Halloween cookies come in various categories, each with its own unique characteristics and visual appeal. These categories include spooky, cute, and themed cookies, each offering a distinct way to celebrate the holiday.
Spooky cookies capture the eerie spirit of Halloween with their dark colors, creepy shapes, and sometimes gruesome details. They often feature bats, spiders, ghosts, and other spooky creatures, and may be decorated with fake blood or cobwebs for an extra touch of fright.
These cookies are perfect for those who enjoy a good scare.
Cute Cookies
In contrast to spooky cookies, cute Halloween cookies embrace the whimsical and adorable side of the holiday. These cookies often feature friendly ghosts, smiling pumpkins, or playful witches, and are decorated with bright colors and cheerful designs. They are a great choice for families with young children, or for those who prefer a more lighthearted Halloween celebration.
Themed Cookies
Themed Halloween cookies take inspiration from popular Halloween characters, movies, or stories. These cookies can be shaped like iconic characters such as Dracula, Frankenstein, or the Bride of Frankenstein, or they can feature scenes from classic horror films. They are a fun way to add a pop culture element to your Halloween festivities.
Essential Ingredients and Equipment

Halloween cookie recipes call for a variety of ingredients, each playing a crucial role in achieving the desired taste, texture, and visual appeal. Understanding the function of each ingredient and using the appropriate equipment ensures successful and delightful Halloween cookie creations.
Common Ingredients
- Flour: The foundation of cookies, flour provides structure and texture. Different types of flour, such as all-purpose, bread, or gluten-free, can be used depending on the recipe.
- Sugar: Sugar adds sweetness, tenderness, and browning to cookies. Granulated sugar is commonly used, but brown sugar can be added for a richer flavor and moist texture.
- Butter or Margarine: Butter or margarine adds richness, flavor, and tenderness to cookies. It also helps create a flaky texture when creamed with sugar.
- Eggs: Eggs provide structure, moisture, and richness to cookies. They also help bind the ingredients together.
- Leavening Agents: Leavening agents, such as baking soda or baking powder, help cookies rise and become light and fluffy.
- Flavorings: Halloween cookies often incorporate various flavorings to enhance their taste. Common flavorings include vanilla extract, chocolate chips, candy pieces, and spices like cinnamon or nutmeg.
Specialized Equipment
- Mixing Bowls: Mixing bowls of different sizes are essential for combining ingredients and preparing the cookie dough.
- Measuring Cups and Spoons: Accurate measuring ensures consistent results. Use standard measuring cups and spoons or a kitchen scale for precise measurements.
- Spatulas: Spatulas help mix and spread the cookie dough, as well as scrape the sides of the mixing bowl to ensure all ingredients are incorporated.
- Rolling Pin: A rolling pin is used to roll out cookie dough for shapes like circles or rectangles before cutting them into desired shapes.
- Cookie Cutters: Cookie cutters come in various shapes, allowing you to create festive Halloween-themed cookies.
- Baking Sheets: Baking sheets are used to bake the cookies in the oven. Use parchment paper or silicone baking mats to prevent sticking.
Tips for Measuring and Preparing Ingredients
Accurate measuring and preparation of ingredients are essential for successful baking. Here are some tips:
- Use measuring cups and spoons specifically designed for cooking and baking.
- For dry ingredients, spoon the ingredient into the measuring cup and level it off with a knife or straight edge.
- For wet ingredients, fill the measuring cup to the desired line.
- Soften butter or margarine to room temperature before creaming it with sugar. This ensures proper mixing and a smooth cookie dough.
- If a recipe calls for melted butter, melt it in the microwave or on the stovetop over low heat, stirring occasionally.
- Bring eggs to room temperature before using them. This helps them mix more evenly into the cookie dough.
Step-by-Step Baking s
Baking Halloween cookies involves a series of precise steps that require attention to detail and careful execution. This section will guide you through the general process, providing detailed s for each step, ensuring you achieve the perfect texture, color, and flavor.
Preparation
Begin by gathering all the necessary ingredients and equipment. Ensure your ingredients are fresh and at room temperature unless otherwise specified in the recipe. Preheat your oven to the temperature indicated in the recipe before starting the dough preparation.
Mixing the Dough
Follow the recipe’s instructions for mixing the dough. Typically, this involves creaming together butter and sugar until light and fluffy. Gradually add eggs one at a time, then incorporate the dry ingredients (flour, baking powder, salt, and spices) in stages, alternating with milk or water.
Mix until just combined, avoiding overmixing.
Chilling the Dough
Chilling the dough is a crucial step that helps prevent the cookies from spreading too much during baking. Wrap the dough tightly in plastic wrap and refrigerate for at least 30 minutes or up to overnight. Chilling firms up the butter, resulting in a denser, chewier cookie.
Rolling and Cutting the Dough
Once the dough is chilled, roll it out on a lightly floured surface to a desired thickness. Use Halloween-themed cookie cutters to cut out shapes, or use a knife to create your own designs. Place the cut-out cookies on a parchment paper-lined baking sheet, spacing them slightly apart.
Baking the Cookies
Bake the cookies in the preheated oven according to the recipe’s instructions. Baking times may vary depending on the size and thickness of the cookies. Keep an eye on the cookies to ensure they do not overbake. The edges should be golden brown, and the centers should be set but still slightly soft.
Cooling and Decorating
Once the cookies are baked, let them cool on the baking sheet for a few minutes before transferring them to a wire rack to cool completely. Decorate the cooled cookies with frosting, sprinkles, or other desired toppings. Be creative and have fun with the decorations to match the Halloween theme.
Common Challenges and Tips
Baking Halloween cookies can sometimes present challenges, but with the right techniques and a bit of practice, you can overcome them. Common challenges include cookies that spread too much, are too dry or too crumbly, or have uneven coloring. Tips for achieving the perfect texture, color, and flavor include using high-quality ingredients, measuring accurately, mixing the dough properly, chilling the dough before baking, and baking the cookies at the correct temperature and for the right amount of time.
Halloween Cookie Decorating Ideas
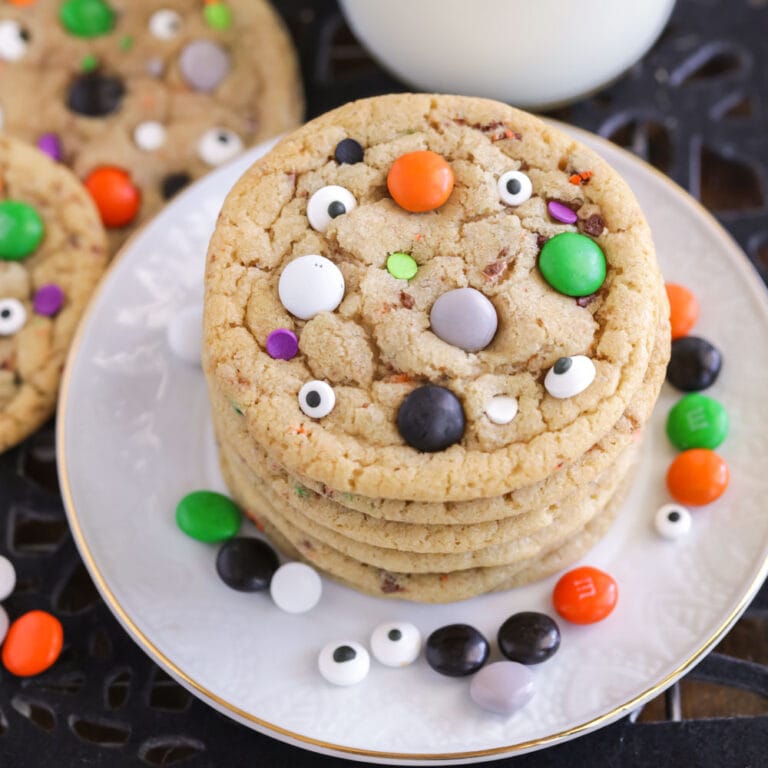
Unleash your creativity and transform your Halloween cookies into spooky masterpieces with these enchanting decorating ideas. Explore a variety of frosting, glaze, and sprinkle options to create eye-catching designs. Discover innovative ways to incorporate edible decorations like candy eyes, sprinkles, and fondant to bring your Halloween-themed cookies to life.
Frosting and Glaze Techniques
Experiment with different frosting and glaze techniques to add depth and dimension to your Halloween cookies. Try a classic buttercream frosting for a smooth and creamy base, or opt for a glossy royal icing for a hard, shiny finish. Create colorful swirls and patterns using multiple frosting colors, or add a touch of sparkle with edible glitter or sanding sugar.
Sprinkles and Edible Decorations
Sprinkles are a festive and easy way to add a pop of color and texture to your Halloween cookies. Choose from a variety of shapes, sizes, and colors to match your Halloween theme. Edible decorations like candy eyes, sprinkles, and fondant can transform your cookies into spooky characters, haunted houses, or other Halloween-inspired designs.
Get creative and let your imagination run wild.
Creating Specific Halloween Designs
With a little planning and creativity, you can create specific Halloween-themed designs or patterns on your cookies. Use cookie cutters in fun shapes like bats, pumpkins, or ghosts to create the base of your design. Add details using frosting, glaze, and edible decorations to bring your Halloween characters or scenes to life.
You can also use stencils or templates to create intricate designs on your cookies.
Variations and Adaptations
The versatility of Halloween cookies allows for a wide range of flavor variations and adaptations to suit different preferences and dietary needs.
Explore different flavor variations of Halloween cookies, such as chocolate, pumpkin, or gingerbread.
Discuss how to adapt the recipe for different dietary restrictions (e.g., gluten-free, vegan).
Provide ideas for incorporating seasonal ingredients or unique flavor combinations.
Share tips for creating Halloween cookies with different textures, such as chewy, crispy, or soft.
Flavor Variations
To add a festive touch, consider incorporating seasonal ingredients like pumpkin puree, apple cider, or candy corn into your Halloween cookies.
Experiment with different extracts and spices, such as vanilla, almond, cinnamon, or nutmeg, to create unique flavor profiles.
For a decadent treat, try adding chocolate chips, cocoa powder, or peanut butter to your cookie dough.
Dietary Adaptations
For those with gluten sensitivities, use gluten-free flour alternatives such as almond flour, coconut flour, or oat flour.
To make vegan Halloween cookies, substitute eggs with flax eggs (made from ground flaxseed and water) and use plant-based butter or coconut oil instead of dairy butter.
For a healthier twist, reduce the amount of sugar in the recipe and add natural sweeteners like honey, maple syrup, or stevia.
Texture Variations
To achieve a chewy texture, use a combination of brown and granulated sugar in your cookie dough.
For crispy cookies, chill the dough before baking and bake at a higher temperature for a shorter amount of time.
For soft and fluffy cookies, add a small amount of cornstarch to the dough and bake at a lower temperature for a longer amount of time.
Presentation and Packaging
Halloween cookies deserve a festive presentation to match their spooky charm. Creatively arrange the cookies on a serving platter or tray. You can create a graveyard scene by placing tombstone-shaped cookies among dirt-covered chocolate chip cookies. Alternatively, arrange cookies in the shape of a spider web, with chocolate chips as the spiders.
For individual packaging, wrap each cookie in cellophane or parchment paper and tie it with a ribbon. Add a Halloween-themed tag or sticker to complete the look. If you’re gifting the cookies, consider using a decorative tin or basket. Line the container with festive tissue paper and place the cookies inside.
Add a layer of cellophane or parchment paper on top to keep them fresh.
Storage and Preservation
Proper storage is crucial to maintain the freshness and quality of Halloween cookies. Store the cookies in an airtight container at room temperature for up to 3 days. For longer storage, freeze the cookies for up to 2 months. When ready to serve, thaw the cookies at room temperature for 30 minutes before enjoying.
To preserve the cookies’ spooky decorations, avoid stacking them in the container. Instead, place them in a single layer to prevent damage. Additionally, consider using a desiccant packet inside the container to absorb moisture and prevent the cookies from becoming soft.
Final Summary
As you embark on your Halloween baking journey, remember that the true magic lies in the joy of creation and the love you pour into each cookie. Experiment with different flavors, decorations, and presentation styles to make your Halloween cookies unique and memorable.
Whether you’re hosting a haunting Halloween party or simply enjoying a cozy night in with family, these delightful treats will add a touch of sweetness to your spooky celebration.
FAQ Summary
Q: What are some popular Halloween cookie shapes?
A: Halloween cookies come in various shapes that reflect the spooky spirit of the season, such as bats, ghosts, pumpkins, witches’ hats, and tombstones.
Q: Can I make Halloween cookies without specialized equipment?
A: Yes, while some recipes may require specific tools like cookie cutters or piping bags, many Halloween cookie recipes can be made with basic kitchen utensils.
Q: How can I make my Halloween cookies extra spooky?
A: Experiment with dark food coloring, eerie decorations like edible eyeballs or spider webs, and spooky packaging to enhance the Halloween theme.
Q: Can I adapt Halloween cookie recipes for different dietary restrictions?
A: Absolutely! With careful ingredient substitutions, you can create gluten-free, vegan, or allergy-friendly Halloween cookies that everyone can enjoy.
Q: How should I store Halloween cookies to maintain their freshness?
A: Store Halloween cookies in an airtight container at room temperature for up to 3 days or in the freezer for up to 2 months to preserve their texture and flavor.